
Canon EOS R1 Camera Settings
Use the instructions below to change the camera settings required for proper communication between the Ortery software and compatible camera.
1. RF Lens Settings
Lens settings for Canon RF 24-50MM F4.5-6.3 IS STM, set:
1. Set Camera Focus toggle to AF.
2. Set the Image Stabilizer to OFF. (when using a tripod or mounting it on an Ortery system)


2. Camera Power Source
Instead of batteries, we strongly recommend using an AC power adapter to power the camera while using the Ortery software.
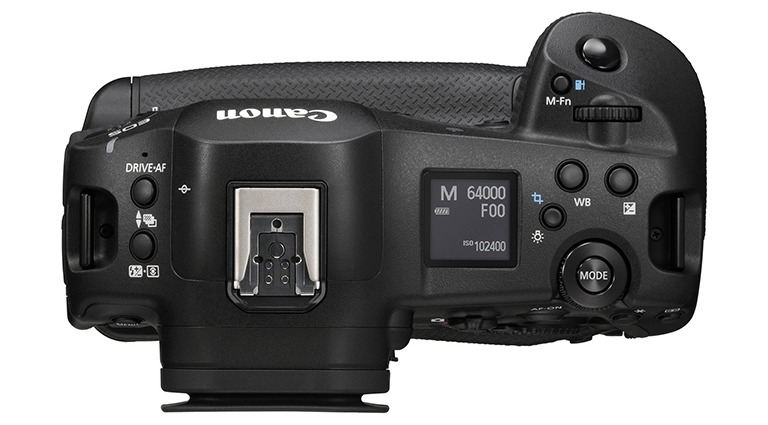
3. R1 Camera Body Settings
- Press Mode on top of the camera and using the touch screen to navigate to Manual (M).
4. Clear Camera Settings
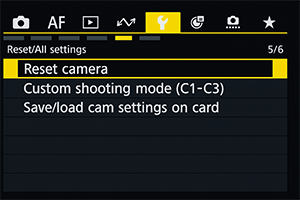
1. Under the 5th submenu in the Set-up menu, select "Reset Camera"
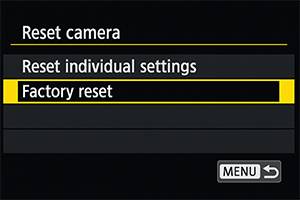
2. The select "Factory Reset"
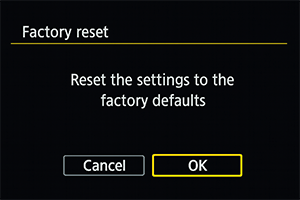
3. Then confirm "Reset the settings to the factory defaults"
5. Turn Off Power Saving Mode
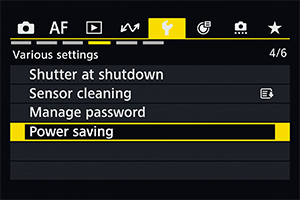
1. Under the 4th submenu in the Set-up menu, select "Power saving"
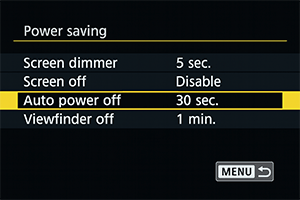
2. Then select "Auto Power Off"
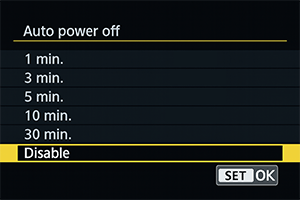
3. Then select "Disable"
6. Disable Auto Rotate
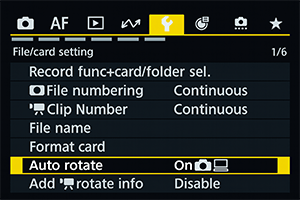
1. Under the 1st submenu in the Setup menu, select "Auto rotate"
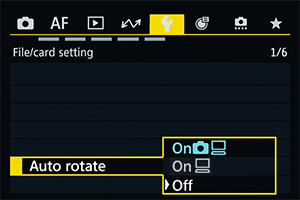
2. Then select "Off"
7. Set Auto Focus
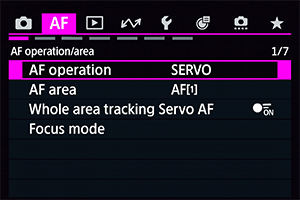
1. Under the 1st submenu in AF, select "AF Operation"
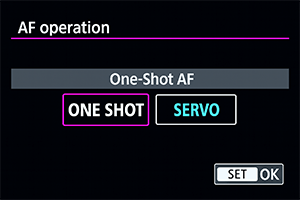
2. Then select "ONE SHOT"

3. Under the first submenu, select "AF area"

4. Then select "1-point AF"
8. Turn Off OVF Simulation
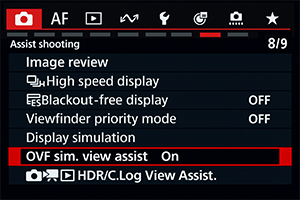
1. Under the 8th submenu, select "OVF sim. view assist"
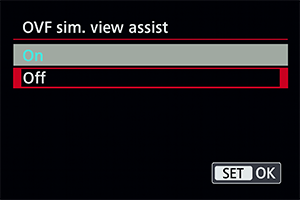
2. Then select "Off"
9. Turn Off Image Stabilizer

1. Under the 7th submenu, select "IS (Image Stabilizer) mode"
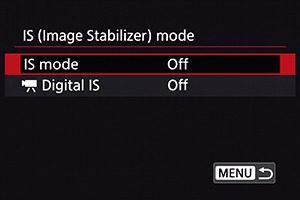
2. Then set both settings to "Off"
Set EOS R1 Movie Mode
Note: For video recording with an Ortery device, you will need a camera SD card installed in the camera.

Adjust the dial on the camera body
to Movie Mode
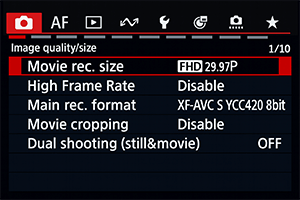
Under the 1st submenu, select "Movie rec. size"
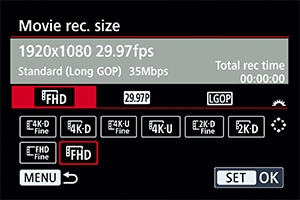
Then select the desired resolution (4K or FHD)
with the desired frame rate (25 or 50 FPS)
Not Sure What You Need?
Let our sales team help you make an informed decision